Set up
Title block setup
Draw a box once in your title block family. Scan2View places the QR code inside it on every sheet that uses that title block.
1. Create the QR Placeholder subcategory
Select a title block on a sheet and click Edit Family. In the family editor, go to Manage›Object Styles.
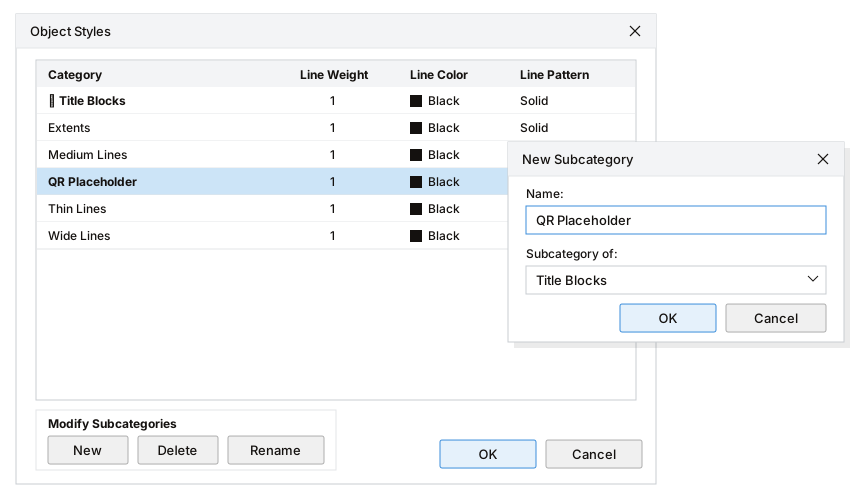
- 1Under Modify Subcategories, click New.
- 2Name: QR Placeholder. Spell it exactly like this.
- 3Subcategory of: Title Blocks. Click OK.
- 4The new subcategory appears under Title Blocks. Click OK to close Object Styles.
2. Draw the box
Draw a square filled region, or four lines, where the QR code should sit. Select it and set its Subcategory to QR Placeholder.
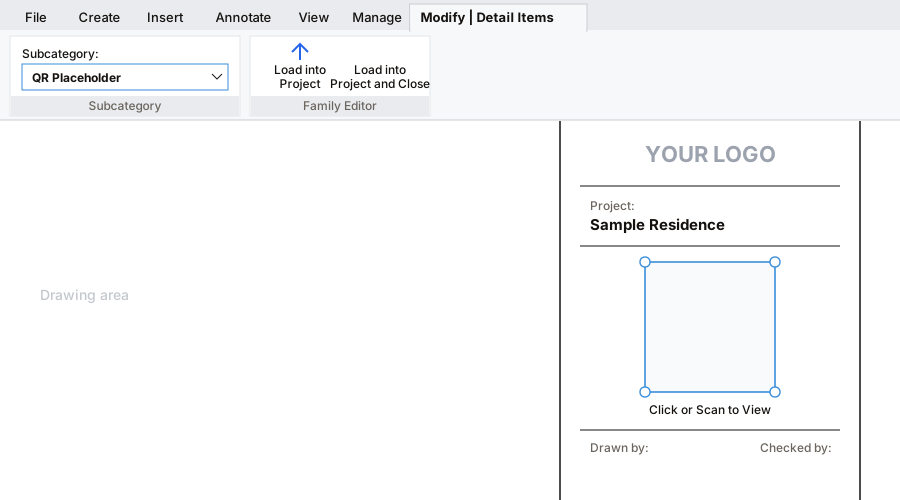
- 1With the box selected, set Subcategory to QR Placeholder.
- 2The box. The QR code is the largest square that fits, centred inside it.
- 3Click Load into Project and overwrite the existing version.
3. Update
Back in the project, click Update QR Codes. Each sheet's QR code moves into the box.
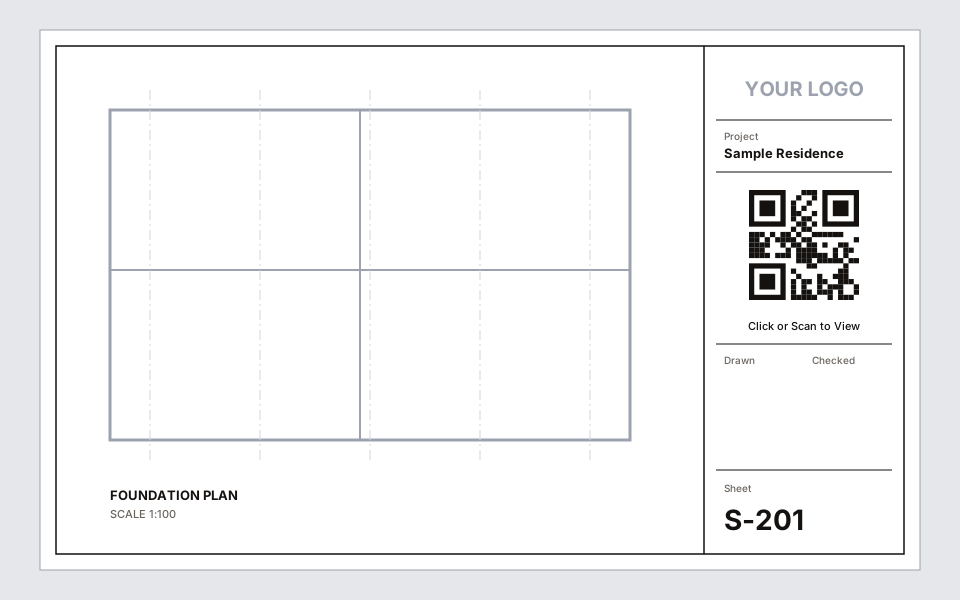
- 1The QR code fills the box exactly. Change the box in the family, reload it, and every sheet follows.
Turn the QR on or off per sheet (optional)
Add a Yes/No instance parameter named QR Code to the title block family.
- If any title block in the project has this parameter, only sheets where it is ticked get a QR code.
- Unticking it on a sheet removes that sheet's QR code.
Without a placeholder
You can skip the box altogether:
- Set Position: drag the QR code where you want it on one sheet, then click Set Position. Every other sheet follows. More
- Parameters: add Length type parameters QR X, QR Y (offset from the title block origin to the QR's bottom-left corner) and QR Size to the family.
When both are present, the placeholder box wins.
Something unclear? Tell us.